Valve cover leaks happen from time to time, especially on older BMWs that have a few miles on the odometer. Although a valve cover gasket leak isn’t something that will leave you stranded on the side of the road, it’s definitely an issue you shouldn’t be ignoring. We’ve put together a guide that will walk you through the replacement procedure for BMW’s M10, M20, M30 engines. It’s a fun project that you can do on your own, and we’re about to show you how.

What Causes Valve Cover Gasket Leaks?
Even though valve cover gaskets aren’t exposed to the same kind of factors as head gaskets, they can still fail. When they do, it’s rarely dramatic. In most cases, valve cover gaskets develop a small leak that gradually becomes more and more severe.
There are several reasons why this happens. More often than not, the failure is caused by the constant temperature cycles the engine goes through during use. Engines that have been neglected are prone to leaky valve covers as infrequent oil changes contribute to premature gasket failure.
That being said, the cause of failure in engines we’re discussing today is often material fatigue. BMW’s factory gaskets that came with M10, M20, and M30 engines were durable, but they aren’t indestructible. Sometimes age is all it takes, and you’ll need to replace that gasket with one from Elring or similar reputable brand. .
Can You Drive a Car With a Valve Cover Gasket Leak?
The short answer is yes. You can drive with a leaky valve cover gasket. However, should you? In most cases, a leaking valve cover gasket will cause engine oil to leak onto the passenger side of the cylinder head. It’s worth mentioning that leakage onto the intake/driver side and the front/rear of the head is also possible. Passenger side leaks tend to find their way into the spark plug cavities and onto the exhaust manifolds.
A heavy leak can continue down the side of the engine block and end up as drips on the ground. Not only is this messy and ugly, but it can deteriorate the spark plug boots and wires and leave unsightly stains on your driveway or garage floor.
How to Diagnose a Valve Cover Gasket Leak?
Diagnosing valve cover gasket leaks is fairly straightforward. The best way to check if your valve cover is leaking is to visually inspect it. Even a small leak will leave a trace of gunk (if it’s old) or a slick spot on the cover. Severe leaks can cause oil to drip down the engine block, which will also be visible once you pop the hood.
Other than that, look for oil spots in your driveway. Gaskets suffering from a serious failure will leak enough oil for it to be visible on the ground. If the oil leaks down the exhaust manifold, you will also be able to smell it in addition to having dirty oil gunk all over the place.
Replacing the Valve Cover Gasket on M10, M20, and M30 Engines
Fortunately, replacement of the valve cover gasket (for the models covered here) is fairly easy and does not require any special tools.
This DIY tutorial will show how to replace the valve cover gasket on the vintage BMW 4 & 6-cylinder engines that have single overhead camshafts. This applies to practically every BMW produced up through the late ’80s / early ’90s with 4-cylinder or 6-cylinder engines. It’s good to know how to fix a leaking valve cover gasket if you plan on getting an E30.
Applicable US models:
1600, 1602, 2002, CS, Bavaria, 318i, 320i, 320is, 325i, 325is, 325ic, 325ix, 325e, 325es, 528e, 533i, 535i, 535is, 633csi, 635csi, L6, 733i, 735i, 735il and L7 – with chassis codes of 114, E3, E9, E10, E21, E23, E24, E28, E30, E32 and E34
Applicable US engine models/codes:
4-cylinder – M10
6-cylinder – M20, M30
This DIY will be performed on a 1987 325is with the M20B25 engine (M20 engine, the 2.5-liter version). The steps and photos are specific to the M20 engine. However, all of the models and engines listed above are similar, and these general steps can be applied to all of these with minor revisions.
Required Parts:
- Valve Cover Gasket set (for the applicable model being repaired)
Required Tools:
- Standard metric mechanic’s toolset with sockets and wrenches (10 mm and 13 mm being the most common sizes needed)
- 1/4” drive torque wrench
- Gasket scraper
- Parts cleaner, such as a brake parts cleaner spray
- Clean rags
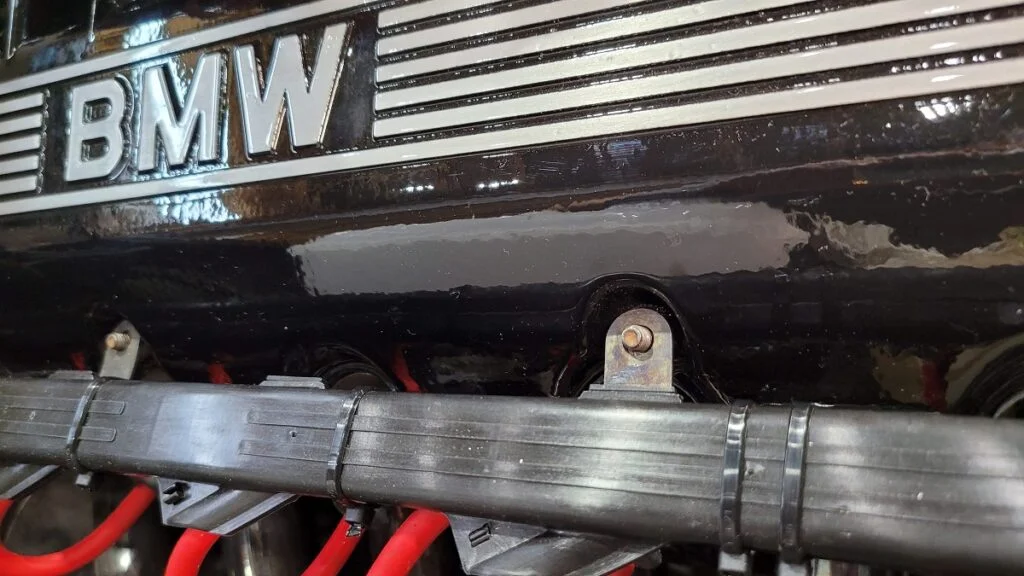
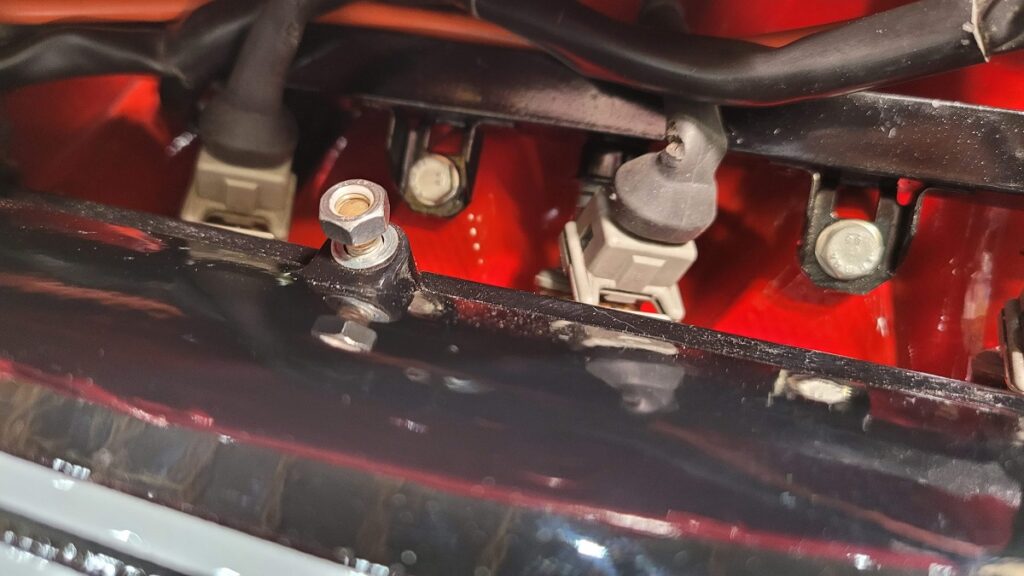
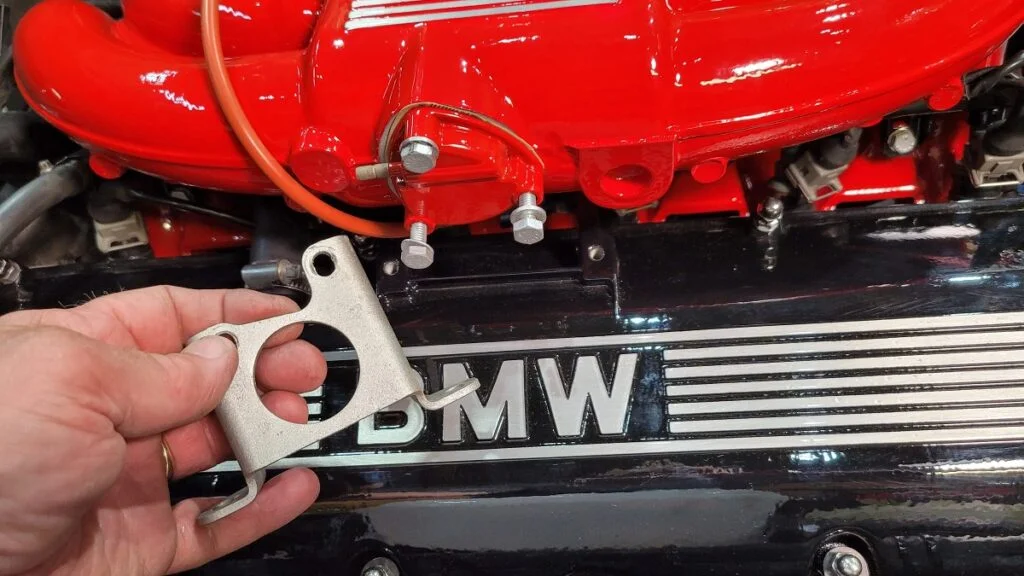
Step 1 – Remove the Intake Manifold Support Brace
Remove the valve cover to intake manifold support brace. Not all models will have this brace, or may have a brace of a different design.
Note that the M30 6-cylinder engines have the intake air filter and the airflow meter mounted toward the passenger side directly above the valve cover. The filter housing, airflow meter and associated intake tubes must be removed in order to access the valve cover.
Step 2 – Disconnect the PCV Hose

Disconnect the PCV (Positive Crankcase Ventilation) hose from the valve cover. The hose may, or may not, have a clamp on the end.
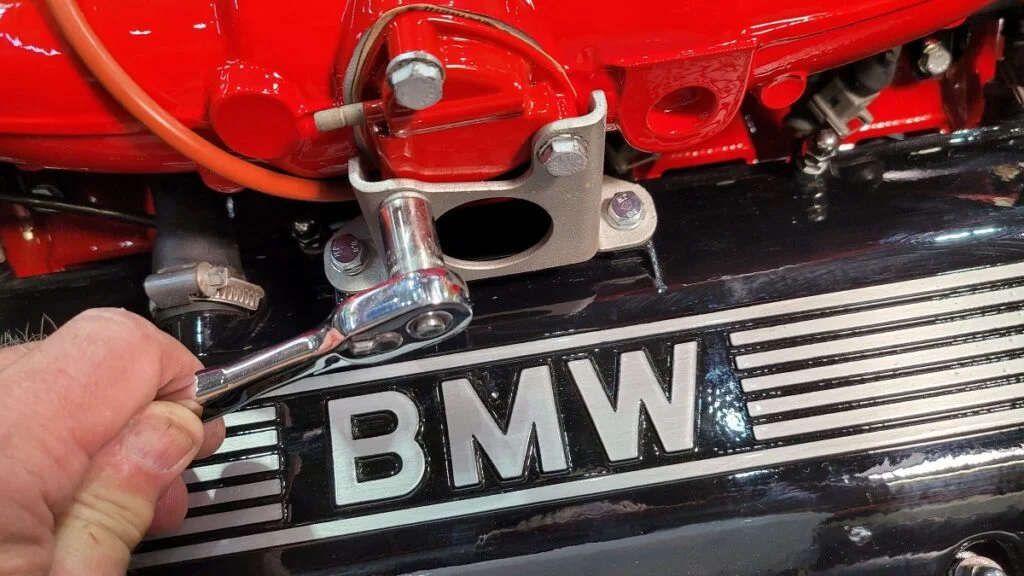
Step 3 – Remove the Security Nuts
Begin loosening the valve cover securing nuts. Start with the middle nuts and work out toward the ends in a spiral pattern.
Step 4 – Remove the Nuts and the Washers
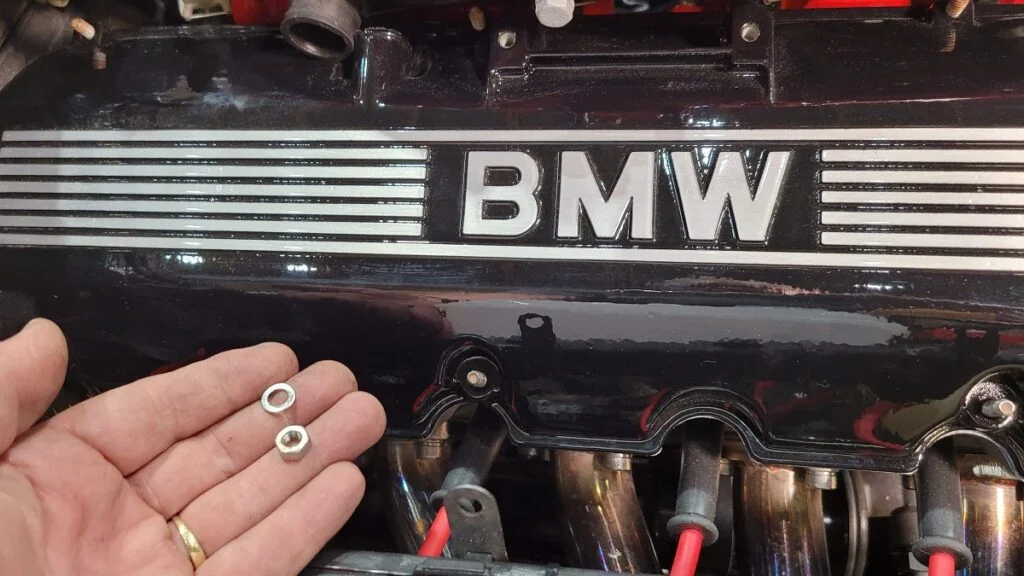
Remove all of the nuts and their respective washers. You might want to put these in a tray somewhere for safekeeping, as you definitely don’t want to lose any of them.
Step 5 – Secure the Spark Plug Wire Loom
Pull the spark plug wire loom from the valve cover studs and set it aside.
Step 6 – Lift the Valve Cover
Using the oil fill cap as a handle, pull up slightly on the valve cover. Grasp the opposite end of the cover and lift upward evenly to pull it up over the studs. If the cover is stuck to the gasket, carefully use a pry tool or gasket scraper to loosen the valve cover.
Step 7 – Remove the Old Gasket
Now, remove the old gasket. You may need to use the gasket scraper here depending on how deteriorated the old one is.
Step 8 – Rubber Rocker Shaft Plugs
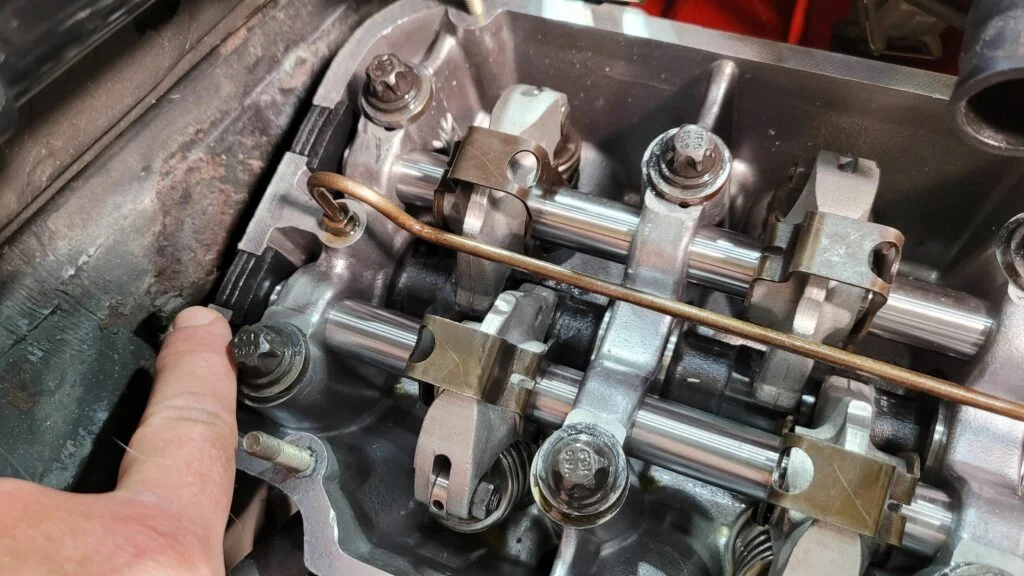
Pry out the rubber rocker shaft plugs. Two at the front and two at the rear. This is unique to the M20 6-cylinder engines.
Step 9 – Prep the Cylinder Head
Clean the oil and old gasket material from the cylinder head and valve cover gasket rails. Use a gasket scraper to carefully scrape the stuck gasket material, without gouging the aluminum surfaces. Remove 100% of the old material. Take care to not allow the gasket pieces to fall into the cylinder head.
Step 10 – Clean the Gasket Mating Surfaces
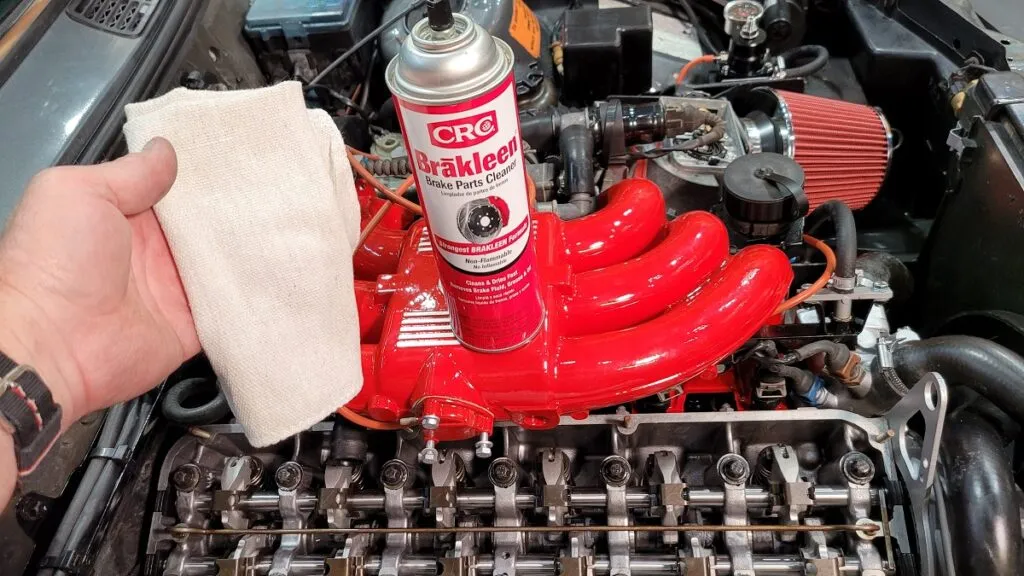
Using a clean rag and a degreaser product, such as brake cleaner, clean the cylinder head and valve cover gasket rails until the rag stays clean after wiping an area.
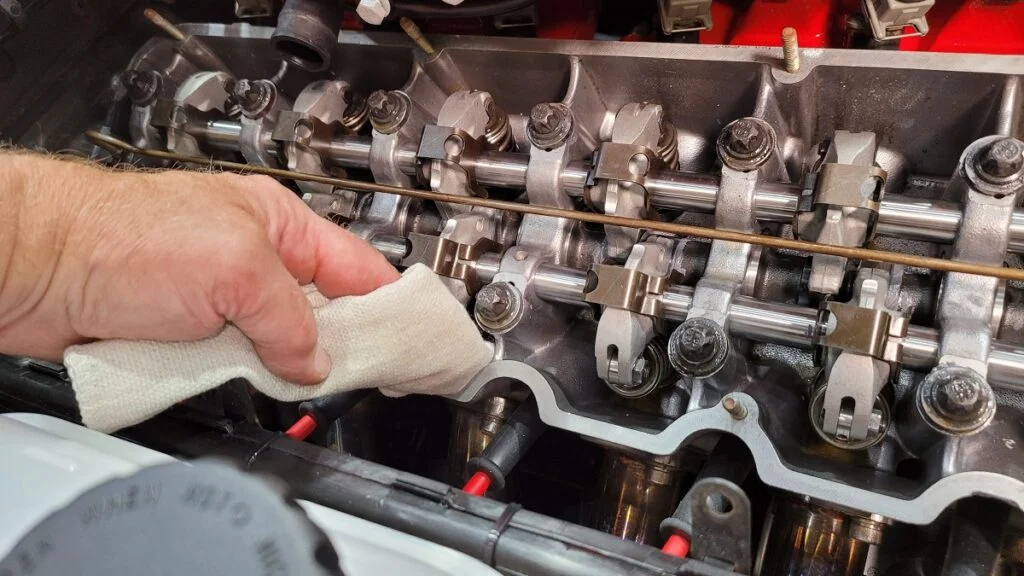
The gasket rails must be fully oil-free.
Step 11 – Install New Rocker Shaft Cut-Out Rubber Plugs

Install the new rocker shaft cut-out rubber plugs. Note that the flanged side of the plugs goes toward the inside of the cylinder head.
Step 12 – Install the New Gasket

Lay the new gasket into place over the studs and onto the gasket rail on the cylinder head.
Step 13 – Reinstall the Valve Cover

Next, place the valve cover carefully over the gasket while making sure that everything is seated properly.
Step 14 – Reinstall the Spark Plug Wire Loom
Place the spark plug wire loom mounting tabs over the applicable valve cover studs along the passenger side of the valve cover.
NOTE: that we are altering this step on the engine shown, and installing all of the nuts prior to installing the wire loom. See step 17 for our explanation for doing this.
Step 15 – Install Washers and Nuts
Place the washers over each of the studs and tread the nuts over them. Lightly tighten the nuts to a point where they have resistance against the washers.
Step 16- Torque the Nuts

Using the 1/4” drive torque wrench, tighten the nuts to the torque specified in the applicable BMW or Bentley Publishers repair manual, in the specified pattern or a simple spiral pattern, starting in the middle of the cover. The torque for this M20 engine is 11 ft-lbs (132 in-lbs).
Step 17 – Stainless Steel Acorn Nuts
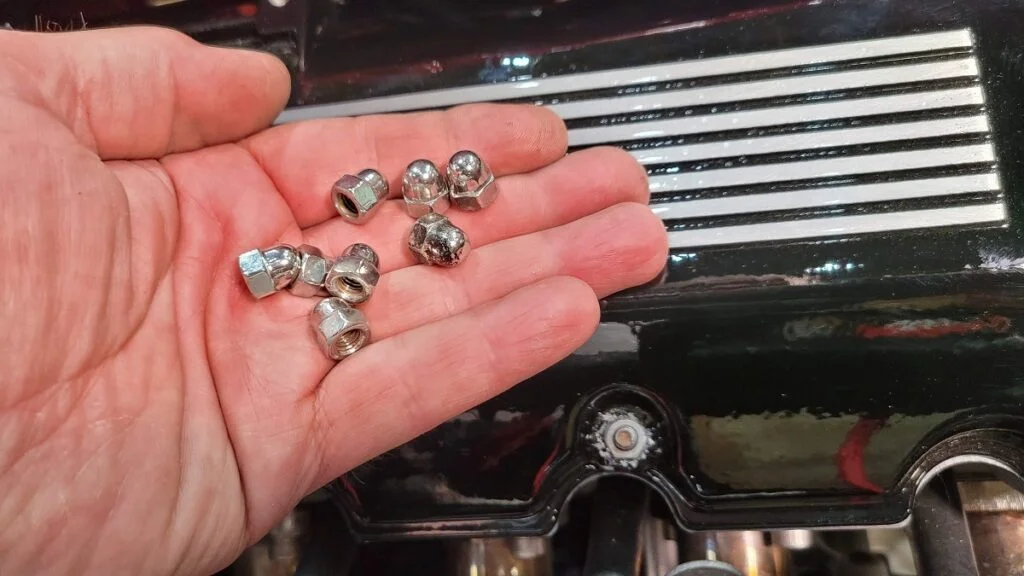
This step can be omitted for a common installation. However, we are installing a set of stainless steel acorn nuts to add detail to the engine.
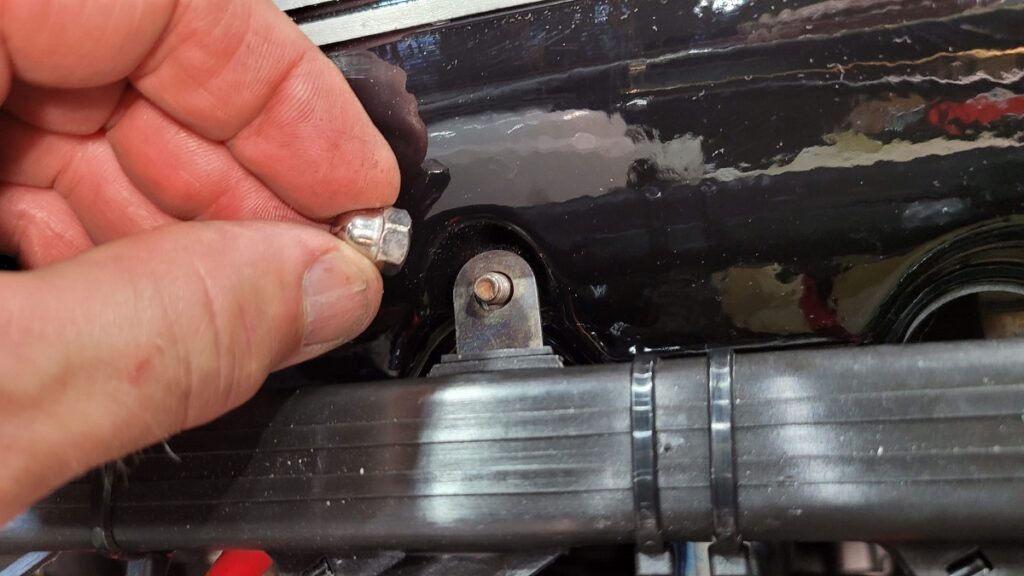
We will install the nuts on the studs, over the standard nuts. We are using both the standard nuts and the acorn nuts as the studs are too long to install the acorn nuts alone. They would bottom out on the studs before properly tightening on the valve cover. If the studs are short enough, the acorn nuts could be installed without the original nuts.
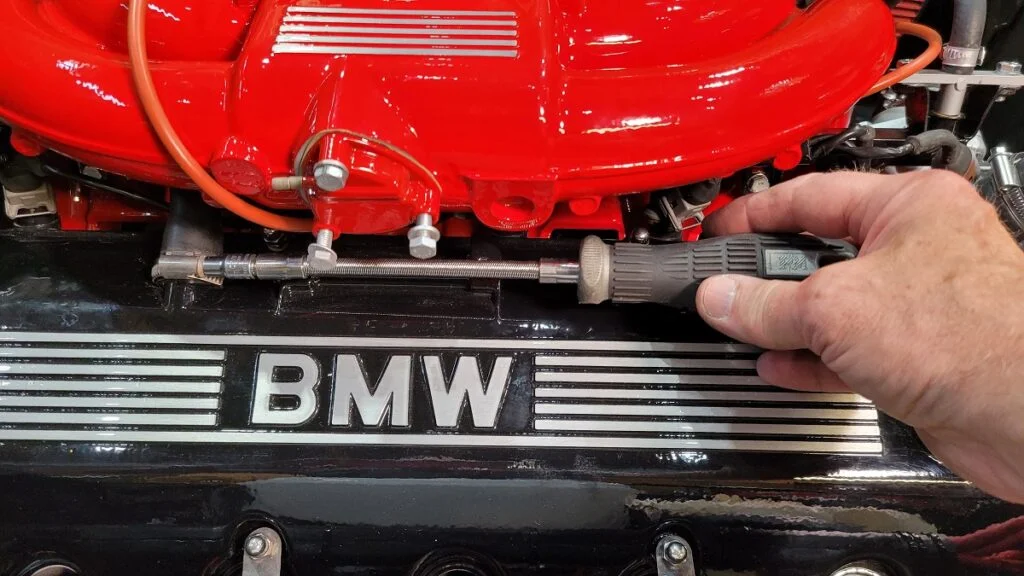
Step 18 – Reinstall the PCV Hose

Reinstall the PCV hose. If a hose clamp was not used originally, it would be wise to install one in order to prevent possible vacuum leaks.
Step 19 – Mount the Support Bracket
We’ve come full circle to the very first thing we took off — the support bracket. Mount it back onto the engine.
Step 20 – M30 6-Cylinder Engine
If you are working on the M30 6-cylinder engine, install the airflow meter, filter housing, and intake tubes.
Step 21 – Start the Engine and Watch for Leaks
Start the engine and inspect for leaks or any other issues with any of the hardware you removed and installed.
Choosing the Right Replacement Valve Cover Gasket for Your BMW
Whether you’re working on an older M10, M20, or M30 engine, or a more modern BMW power plant, one rule always applies — use quality gaskets. We offer a wide range of valve cover gaskets for a variety of BMW motors.
To find one that perfectly matches your bimmer, simply head over to our store and select your vehicle using our car selection tool. Once our system crunches the data, you’ll get a complete list of products that fit your car.